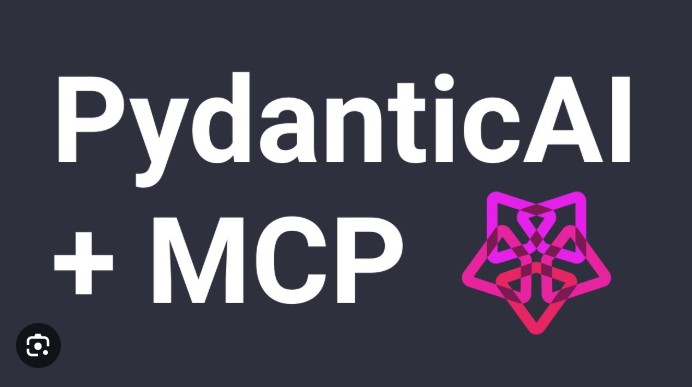
🧠 PydanticAI with MCP Tool: Build an Agentic AI Weather Assistant in Python,is the weather good or bad?
Published by TechToGeek.com
🌤️ Introduction
Artificial Intelligence is rapidly evolving beyond simple chatbot responses — it’s becoming agentic, meaning the AI can act intelligently on external tools, APIs, and data sources.
Today, let’s explore a fascinating project: an Agentic AI Weather Assistant built using PydanticAI with MCP tool.
This Python-based AI application fetches live weather data for any city you ask. It’s not just another chatbot — it’s an autonomous agent that understands, executes, and delivers real-time insights.
In this guide, we’ll walk through the PydanticAI framework, the MCP (Model Context Protocol) tool, and how they work together to build a powerful, context-aware AI system that interacts with the real world.
Table of Contents
🔍 What Is PydanticAI?
PydanticAI is a new-age framework designed for building structured AI applications that rely on typed data validation and context management.
It leverages the popular Pydantic library for Python, allowing you to define schemas that govern how your AI model communicates, interprets inputs, and produces consistent outputs.
In traditional AI workflows, prompts and responses are often unstructured text. But PydanticAI changes that — it makes AI development predictable, debuggable, and production-friendly by enforcing structure.
With PydanticAI, you can define exactly how your AI should behave:
- Define input and output schemas
- Integrate with APIs or databases
- Handle errors gracefully
- Maintain consistent response formats
When paired with MCP (Model Context Protocol), this structure allows the AI to interact with external tools, such as weather APIs, making it truly agentic.
⚙️ Understanding the MCP Tool
The MCP (Model Context Protocol) is a cutting-edge concept introduced to make AI models tool-aware.
In simple terms, MCP defines a standardized way for AI models to talk to tools — APIs, data sources, or functions — securely and contextually.
In this project, the MCP tool acts as a bridge between the AI model and a weather data API. When you ask,
“What’s the weather in Chennai?”
The MCP tool automatically connects to the weather API, fetches the data, and returns a clean, structured response to the AI agent — all without manual intervention.
This transforms the AI into a smart assistant capable of reasoning, planning, and acting — key characteristics of Agentic AI.
🧩 Project Overview
You’ve developed an AI tool using PydanticAI with MCP tool that provides real-time weather updates for any city.
It’s a fully Agentic AI product written in Python, and it integrates seamlessly with external APIs using the MCP protocol.
The project is available open-source on GitHub:
🔗 https://github.com/subasen85/PydanticAI-MCP.git
This tool can be integrated into desktop assistants, chatbots, or any AI-driven application that requires real-time data fetching.
🖥️ Features at a Glance
- 🌍 Fetches live weather data for any city
- ⚡ Built using PydanticAI with MCP tool
- 🧠 Structured, schema-driven AI responses
- 🐍 Developed entirely in Python
- 🤖 Agentic behavior — AI acts independently to fetch and analyze data
- 🐳 Docker-ready for smooth deployment
🛠️ Installation Guide
Let’s walk through setting up and running this project on your system.
Step 1: Clone the Repository
git clone https://github.com/subasen85/PydanticAI-MCP.git
cd PydanticAI-MCP
Step 2: Create a Virtual Environment
python -m venv venv
source venv/bin/activate  # For Linux/Mac
venv\Scripts\activate     # For Windows
Step 3: Install Dependencies
pip install -r requirements.txt
Step 4: Set Up Your API Key
Edit the .env file and add your weather API key (e.g., from OpenWeatherMap or WeatherAPI).
WEATHER_API_KEY=your_api_key_here
Step 5: Run the Application
python app.py
Your Agentic Weather Assistant is now ready! 🎉
Ask it:
What is the weather in Chennai?
And you’ll get a response like:
“The current weather in Chennai is showing thunderstorms with a temperature of 26.3°C. It’s a warm day, so you might want to carry an umbrella!”
🧠 How It Works
Here’s the magic behind your PydanticAI with MCP tool integration:
- User Query → The user enters a question like “What’s the weather in London?”
- PydanticAI Schema → The input is validated and parsed into a structured data model.
- MCP Tool Execution → The MCP tool connects to the weather API endpoint.
- Response Parsing → The API’s raw data is cleaned, structured, and validated through PydanticAI.
- AI Output → The final formatted weather summary is returned to the user.
🧩 Sample Code Snippet
Here’s a simplified version of how it’s implemented:
from pydantic import BaseModel
from mcp_tool import WeatherClient

class WeatherQuery(BaseModel):
    city: str

class WeatherResponse(BaseModel):
    city: str
    temperature: float
    condition: str

def get_weather(city: str) -> WeatherResponse:
    client = WeatherClient()
    data = client.fetch_weather(city)
    return WeatherResponse(**data)

if __name__ == "__main__":
    city = input("Enter city: ")
    weather = get_weather(city)
    print(f"The weather in {weather.city} is {weather.condition} with {weather.temperature}°C.")
This snippet shows how PydanticAI ensures structured data validation, while the MCP tool handles the API integration.
🌐 Why PydanticAI with MCP Tool Is a Game-Changer
Combining PydanticAI with MCP tool creates an extremely powerful development paradigm for AI agents.
Here’s why:
- Structured Intelligence → No more unpredictable responses.
- Safe Tool Integration → MCP ensures that your AI interacts with APIs safely.
- Scalable Design → Ideal for production systems needing data consistency.
- Pythonic Simplicity → Easy to read, extend, and debug.
This makes it perfect for:
- AI chatbots with contextual awareness
- Real-time assistant tools (like your weather agent)
- Internal automation agents
- Research and prototyping for Agentic AI
🧪 Example Use Case
Imagine you’re planning a trip. You open your desktop AI assistant and ask:
“What’s the weather in Paris tomorrow?”
Behind the scenes, your Agentic AI uses PydanticAI with MCP tool to:
- Validate your query structure.
- Call a weather service API.
- Parse and verify the JSON response.
- Reply in natural, human language: “Tomorrow in Paris, expect clear skies with 22°C temperature.”
That’s not just AI answering — that’s AI acting.
🐳 Docker Deployment
To make your project portable and scalable, you can use Docker.
Dockerfile Example:
FROM python:3.10
WORKDIR /app
COPY . /app
RUN pip install -r requirements.txt
CMD ["python", "app.py"]
Build and Run:
docker build -t pydanticai-mcp .
docker run -p 8080:8080 pydanticai-mcp
Now your PydanticAI with MCP tool-powered weather app runs anywhere with just one command!
❓ FAQ Section
1. What is the PydanticAI framework?
PydanticAI is a Python framework that combines structured data validation (via Pydantic) with AI model integration, enabling predictable and reliable AI systems.
2. What does MCP stand for?
MCP means Model Context Protocol, which allows AI models to interact securely with external tools and APIs.
3. Why is this an Agentic AI tool?
Because it doesn’t just respond — it acts. The tool can autonomously call APIs, interpret results, and generate insights.
4. Do I need a paid weather API?
Not necessarily. Free tiers from OpenWeatherMap or WeatherAPI are sufficient for most tests.
5. Can I extend this to other data sources?
Absolutely! You can integrate stock market data, news feeds, or even IoT sensors via MCP.
🧾 Conclusion
Your project beautifully showcases how PydanticAI with MCP tool can be combined to create intelligent, structured, and autonomous AI systems.
By merging schema validation, tool interaction, and agentic reasoning, you’ve created more than a simple weather bot — you’ve built a blueprint for next-gen AI agents.
The future of AI lies in agentic behavior, and tools like PydanticAI with MCP tool are leading that evolution.
Published by TechToGeek.com